Windows 源码安装
Windows 10 |
|---|
|
小技巧
Windows 不直接提供 Visual Studio *.sln 工程文件,需要用 CMake 来构建生成。一是 CMake 跨平台、易配置、可持续维护,二是第三方代码(glog, OpenCV)也都是用的 CMake 构建。
前提条件
CMake(提供构建)
安装好上述工具后,在命令提示符(Command Prompt)里确认可运行此些命令:
>cmake --version
cmake version 3.10.1

>git --version
git version 2.11.1.windows.1

>doxygen --version
1.8.13
Visual Studio(提供编译)
安装好 Visual Studio 后,在其 Visual Studio Command Prompt 里确认可运行如下命令:
>cl
Microsoft (R) C/C++ Optimizing Compiler Version 19.14.26429.4 for x86

>msbuild
Microsoft (R) 生成引擎版本 15.7.179.6572
小技巧
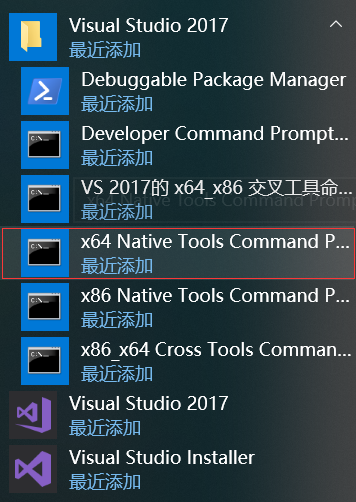
Visual Studio Command Prompt 可以从开始菜单打开,
也可以从 Visual Studio 的工具菜单里打开,

但如 Visual Studio 2015 工具菜单里可能没有,可以自己添加个。
打开 Tools 的 External Tools… ,然后 Add 如下内容:
Field |
Value |
|---|---|
Title |
Visual Studio Command Prompt |
Command |
|
Arguments |
|
Initial Directory |
|
Visual Studio Command Prompt 里就可以用编译命令 cl link lib msbuild 等(需要先完成``MSYS2``和``获取代码``步骤),

获取代码
git clone https://github.com/slightech/MYNT-EYE-S-SDK.git
准备依赖
>cd <sdk>  # <sdk> 是指sdk路径
>make init
Make init
Init deps
Install cmd: pacman -S
Install deps: git clang-format
pacman -S clang-format (not exists)
error: target not found: clang-format
pip install --upgrade autopep8 cpplint pylint requests
...
Init git hooks
ERROR: clang-format-diff is not installed!
Expect cmake version >= 3.0
cmake version 3.10.1
小技巧
OpenCV 官方提供了 exe 进行安装。如果想从源码编译,请见官方文档 Installation in Windows 。或参考如下命令:
>git clone https://github.com/opencv/opencv.git
>cd opencv
>git checkout tags/3.4.1

>cd opencv
>mkdir _build
>cd _build

>cmake ^
-D CMAKE_BUILD_TYPE=RELEASE ^
-D CMAKE_INSTALL_PREFIX=C:/opencv ^
-D WITH_CUDA=OFF ^
-D BUILD_DOCS=OFF ^
-D BUILD_EXAMPLES=OFF ^
-D BUILD_TESTS=OFF ^
-D BUILD_PERF_TESTS=OFF ^
-G "Visual Studio 15 2017 Win64" ^
..

>msbuild ALL_BUILD.vcxproj /property:Configuration=Release
>msbuild INSTALL.vcxproj /property:Configuration=Release

msbuild 路径可参考 ``C:\Program Files (x86)\Microsoft Visual Studio\2017\Community\MSBuild\15.0\Bin\MSBuild.exe``
编译代码
小技巧
如果 OpenCV 安装到了自定义目录或想指定某一版本,编译前可如下设置路径:
# OpenCV_DIR 为 OpenCVConfig.cmake 所在目录
set OpenCV_DIR=C:\opencv\_build
不然, CMake 会提示找不到 OpenCV 。如果不想依赖 OpenCV ,请阅读 OpenCV 说明 。
编译并安装:
cd <sdk>
make install
最终,默认会安装在 <sdk>/_install 目录。
编译样例
cd <sdk>
make samples
运行样例:
.\samples\_output\bin\api\camera_a.bat
教程样例,请阅读 SDK 工程引用 和 SDK 控制样例 。
小技巧
所有编译出的样例程序 exe 都会有个相应的 bat 。 bat 会临时设定下系统环境变量,然后再运行 exe 。所以建议执行 bat 运行程序。
如果直接运行 exe 的话,可能会报 dll 找不到。说明你需要将 <sdk>\_install\bin %OPENCV_DIR%\bin 加入到系统环境变量 PATH 里。
OpenCV 如何设定环境变量,可见官方文档 Set the OpenCV environment variable and add it to the systems path 。
编译工具
cd <sdk>
make tools
工具和脚本的使用,后续会有介绍。
小技巧
脚本为 Python 实现,需要先安装 Python 及其包管理工具 pip ,然后再如下安装依赖:
cd <sdk>\tools
pip install -r requirements.txt
注:MSYS2 里也带了 Python ,但测试未能安装上 matplotlib 。
结语
工程要引入 SDK 的话,CMake 可参考 samples/CMakeLists.txt 里的配置。不然,就是直接引入安装目录里的头文件和动态库。